Photonyx Interface
Here you have a screenshot of the interface ... click on the item about the one you wish to have a detailed information. This is a very easy way to start descorvering Photonyx. Navigate this virtual help-book through the elements of Photonyx interface.
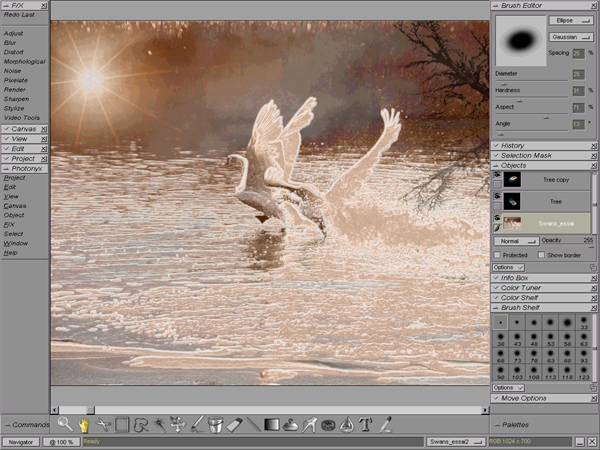
The Photonyx work area includes the command menus on the left of your screen, the main window containing all the open projects including the one you are editing, on the right the palettes that let you edit images and add elements such as masks, layers, and channels. Whitin Photonyx all the command menus and Palettes are stored in docks that can be open or close to save workspace for better viewing your projects. On the bottom of your workspace you'll find the status bar, containing the toolsbar as well as many other important features. Note that the status bar also supports the Commands- and Palettes- Docks. Click below for more.
Control panel
The control panel or status bar of Photonyx contains the 2 docks (Commands and Palettes), the Toolbar, the Navigator, the Zoom control, the Project Selector. It also gathers informations about the current project down on the left (color mode and size)
![]() In the lower left corner you'll
also find icons allowing you to minimize or close Photonyx.
In the lower left corner you'll
also find icons allowing you to minimize or close Photonyx.
The status bar as well as the open docks can be hidden using spacebar. Restore the whole status bar the same way. In a simple move you can have a full panoramic view on your working space.
 Commands
dock
Commands
dock
Click on the Commands dock to expand or close it (if already open). You can also drag command palettes into the Commands dock either closed or open to store them.
Displace command menus easily. Just grab the dialog box and displace it on another place on the workarea. You don't need to grab the caption bar of the command, simply click an empty place into the dialog box !
To navigate, that is scroll up or down the commands into the Commands dock, simply drag any of the command's caption bar and move up or down until you can access the desired item.
To store a command into the Commands dock, right-click on its caption bar and choose dock, to undock it choose undock. Even quicker is to right-click and drag to the command dock either open or closed to achieve exactly the same result.... is that simple !
![]() To expand or collapse the menu
click on the handle and click on the cross to close it
To expand or collapse the menu
click on the handle and click on the cross to close it![]() .
.
 Palettes
dock
Palettes
dock
Palettes are manipulated exaclty the same way as the commands menus. But some Palettes
have the bonus option to be resizable. To do that simply click on the resize icon (![]() ) and drag until you match the right
size which is ... the one you want !
) and drag until you match the right
size which is ... the one you want !
 Navigator
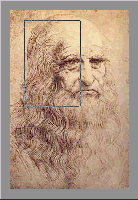 Click on the navigator to
display a thumbnail of your current project. In this thumbnail, the window you're looking
at on the workarea is surrounded by the rectangle featuring the part of the image you can
see in the current window. Hold the button of your mouse and drag to displace the current
window precisely on the place you want within your project. The hand tool automatically
appears when the navigator is selected. While navigating through the thumbnail you still
have the possibility to zoom by clicking on the right button of your mouse !
Click on the navigator to
display a thumbnail of your current project. In this thumbnail, the window you're looking
at on the workarea is surrounded by the rectangle featuring the part of the image you can
see in the current window. Hold the button of your mouse and drag to displace the current
window precisely on the place you want within your project. The hand tool automatically
appears when the navigator is selected. While navigating through the thumbnail you still
have the possibility to zoom by clicking on the right button of your mouse !
 Zoom control
The zoom control is the best way to quickly zoom in or out the current project. Left click with your mouse on the zoom control box, hold the left button and move forward and backward to set instinctively the zoom ration you prefer (watch the ratio in the zoom box !), when done release the left button. Voilα!
Project selector

The project selector is the box containing all the open projects it allows you to choose the one you want to edit. Click on the project selector to open it and scroll to select the project you wish to edit.
![]()